TPO Roof Installation – 10 Critical Steps & Insights

Looking to protect your building with a durable, energy-efficient roof? TPO roof installation is one of the most popular choices for commercial and residential flat roofs thanks to its affordability, UV resistance, and long-lasting performance.
How to install TPO roofing?
Here’s a quick overview:
- Inspect and prepare the existing roof surface
- Install insulation boards as needed
- Add a cover board layer for extra protection
- Roll out and position the TPO membrane sheets
- Secure the membrane mechanically or with adhesive
- Heat-weld the seams to create a watertight seal
- Flash around penetrations like vents and HVAC units
- Install edge metal or termination bars
- Conduct a final inspection and water leak test
- Conduct Final Inspection & Leak Testing
Ready to dive deeper into each step, compare costs, and discover maintenance tips? Read on to learn everything you need to know about TPO roof installation.

1. Inspect and prepare the existing roof surface
Before starting your TPO roof installation, inspect the existing roof deck thoroughly. Look for any damage, moisture issues, or structural concerns that need repair. A clean, dry, and solid substrate is essential for a successful installation.
Key preparation steps include:
- Remove debris and old materials: Sweep away dirt, gravel, or remnants from previous roofing systems.
- Repair and reinforce decking: Replace rotted sections, patch holes, and ensure a smooth, stable surface.
- Check drainage and slope: Verify the roof has adequate slope to prevent standing water, which can shorten the lifespan of TPO membranes.
Proper inspection and preparation lay the groundwork for a seamless installation and a roof that performs reliably for years to come.
2. Install insulation boards as needed
Once the roof deck is clean and prepared, the next step in TPO roof installation is adding insulation. Insulation improves your building’s energy efficiency and creates a solid base for the TPO membrane.
Common insulation options include:
- Polyiso (Polyisocyanurate): The most popular choice for its high R-value and cost-effectiveness.
- EPS (Expanded Polystyrene): Lightweight and moisture-resistant, ideal for budget-conscious projects.
- XPS (Extruded Polystyrene): Durable and resistant to water absorption, often used in high-moisture environments.
Install insulation boards in staggered patterns, attaching them mechanically or with adhesive per manufacturer guidelines. Make sure the surface is level, with no gaps between boards, to prevent future membrane stress or punctures.
Proper insulation not only helps lower heating and cooling costs but also extends the life of your TPO roofing system.
Request A Free Quote
Speak To Our Roofing Specialists Today!
National Roofing & Solar offers expert commercial roof replacements, leak repairs, and solar upgrades, maximizing energy efficiency and ROI.
3. Add a cover board layer for extra protection
After the insulation is in place, the next step is installing a cover board. A cover board provides an added layer of protection between the insulation and the TPO membrane, enhancing durability, fire resistance, and overall roof performance.
Key points to consider:
- Material choices: Popular options include gypsum-based boards, high-density polyiso, or cement boards, depending on local code and project requirements.
- Installation: Lay the cover boards over the insulation in a staggered pattern, aligning joints properly to avoid weak spots.
- Attachment: Fasten according to manufacturer specifications, using screws and plates or approved adhesives to prevent shifting or uplift.
The cover board creates a smooth, solid surface that reduces membrane puncture risk and improves seam strength during heat welding.
4. Roll out and position the TPO membrane sheets
Once the cover board is in place, it’s time to lay out the TPO membrane sheets. This step helps ensure proper alignment and reduces waste prior to attachment.
Steps to follow:
- Unroll the membrane: Begin at the lowest point of the roof and unroll the TPO sheets carefully, allowing them to relax and flatten for easier handling.
- Check alignment: Position each sheet so seams will run parallel to the slope, which aids drainage and improves seam strength.
- Overlap edges: Maintain consistent overlap (typically 3–6 inches) between sheets, as recommended by the manufacturer, to ensure a strong weld later.
Laying out the membrane properly from the start makes the next steps — positioning, securing, and welding — more efficient and reliable.
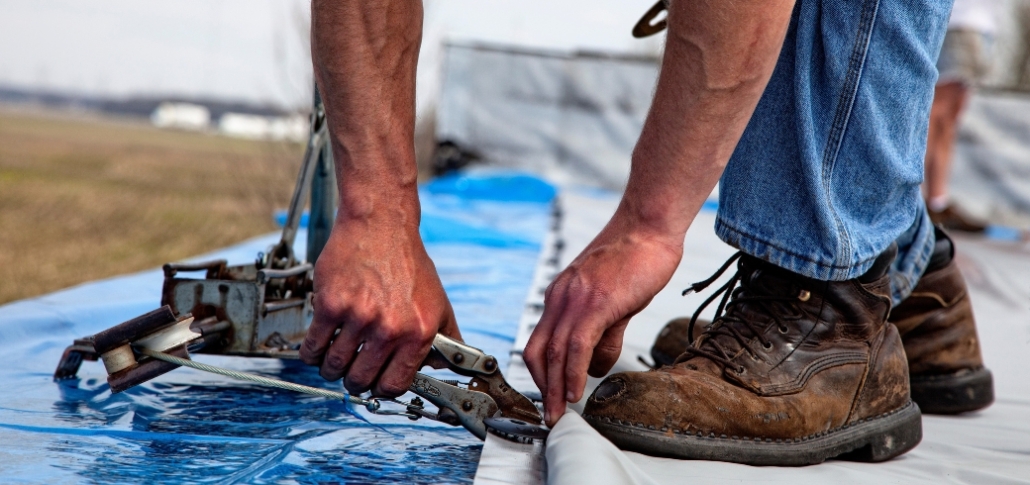
5. Secure the membrane mechanically or with adhesive
After laying out the TPO roof installation membrane, carefully position and align each sheet for a precise fit. Proper alignment is crucial to ensure strong, watertight seams and a clean finished appearance.
Tips for positioning and alignment:
- Smooth out wrinkles: Use a broom or roller to smooth out air pockets and wrinkles, ensuring optimal weld quality.
- Adjust overlaps: Double-check that all overlaps meet manufacturer specifications — consistent overlaps help create strong, reliable seams.
- Set up welding path: Make sure seams are straight and accessible, allowing enough space for the heat-welding equipment to operate smoothly along the seam line.
Taking time to align the membrane accurately at this stage saves effort later and helps ensure a professional, long-lasting installation.
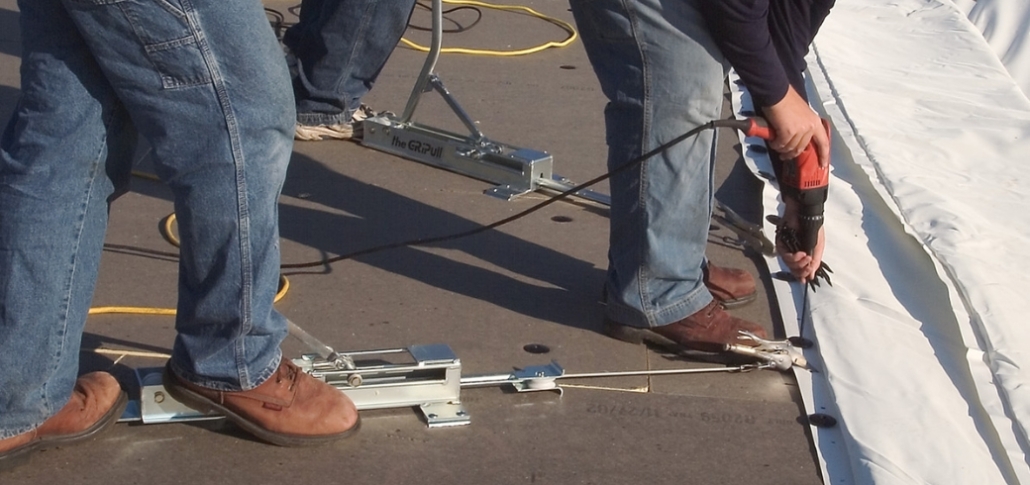
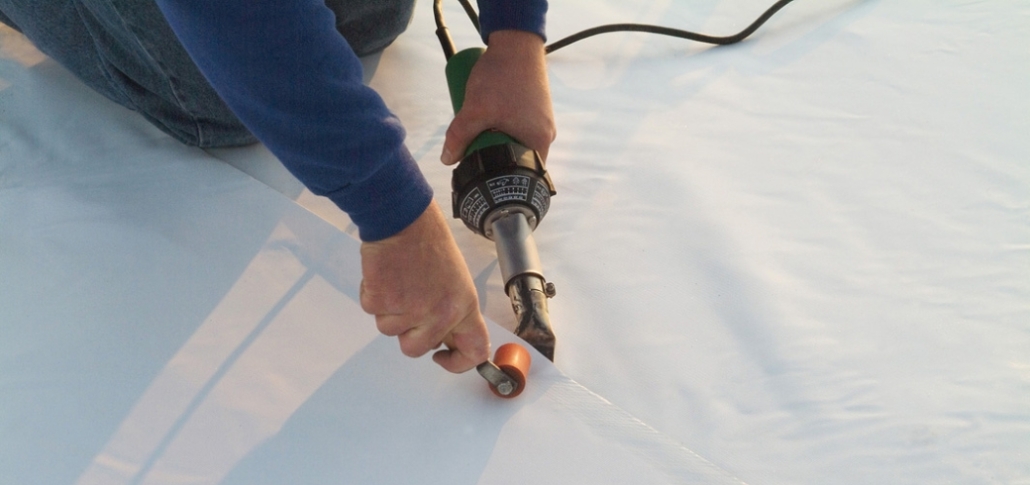
6. Heat-weld the seams to create a watertight seal
Once the TPO sheets are positioned and aligned, it’s time to secure the membrane to the roof deck. This step locks the membrane in place and prepares it for seam welding.
Common securing methods include:
- Mechanical attachment: Fasten the membrane with screws and plates along the seam edges, following manufacturer spacing guidelines. This is the most widely used method for larger commercial installations.
- Adhesive bonding: For fully adhered systems, apply manufacturer-approved bonding adhesive evenly across the substrate, then roll the membrane into place, smoothing it out to ensure strong contact.
No matter the method, it’s important to follow specifications closely to prevent future wind uplift, shifting, or membrane failure.
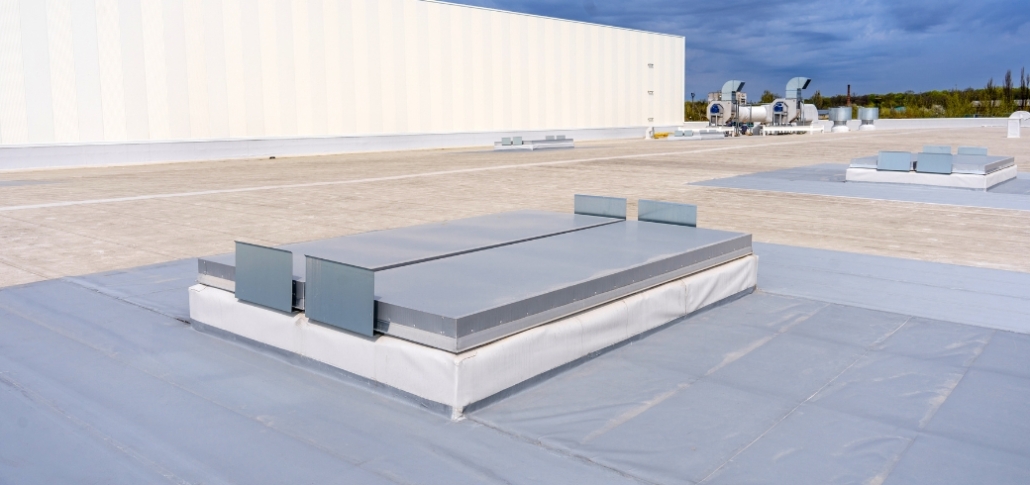
7. Flash around penetrations like vents and HVAC units
Once the membrane is secured, the next essential step is to heat-weld the seams. This process bonds overlapping TPO sheets into a single, continuous layer that resists water infiltration.
Key points for effective seam welding:
- Use proper equipment: A hot-air welder (robotic or hand-held) set to the correct temperature ensures strong, consistent welds.
- Test settings: Always perform a test weld on scrap material to verify temperature and speed before starting on the roof.
- Weld systematically: Move steadily along the seam, pressing firmly with a roller to eliminate air pockets and ensure full adhesion.
Strong, uniform welds are essential for leak prevention and membrane longevity — take your time and inspect each weld thoroughly before proceeding.
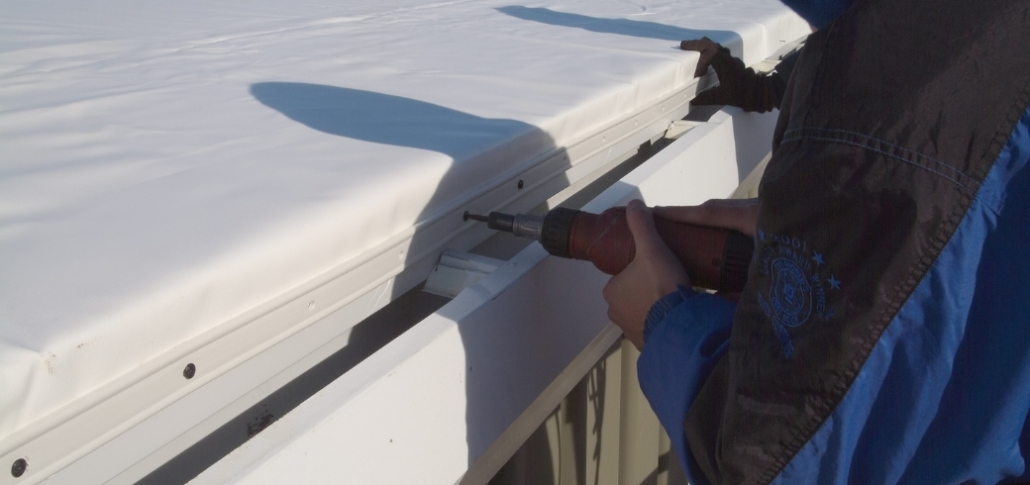
8. Install edge metal or termination bars
Next, address any roof penetrations — such as vents, drains, pipes, or HVAC units — by properly flashing them with TPO-compatible accessories.
Steps to flash penetrations:
- Clean and prime surfaces: Ensure the area around the penetration is clean, dry, and ready for bonding.
- Install prefabricated boots or custom flashings: Use manufacturer-approved TPO boots or field-fabricate flashing pieces to fit snugly around penetrations.
- Heat-weld seams: Seam the flashing into the field membrane using a hot-air welder, ensuring complete coverage and a watertight seal.
Proper flashing around penetrations is essential to prevent leaks and enhance the longevity of the TPO roof installation.
9. Conduct a final inspection and water leak test
To finish the perimeter of the roof, install edge metal or termination bars. These components secure the membrane edges, protect against wind uplift, and provide a clean, professional look.
Key steps:
- Install edge metal: Attach drip edge or metal flashing along roof perimeters where needed, ensuring tight contact with the membrane.
- Use termination bars: At walls or vertical transitions, fasten termination bars over the membrane edge to lock it in place and prevent water intrusion.
- Seal fasteners: Apply manufacturer-approved sealant over fastener heads and edges to reinforce waterproofing.
Proper edge securement is essential for long-term durability and code compliance.
10. Conduct Final Inspection & Leak Testing
Before completing the project, perform a thorough final inspection and leak test to ensure the TPO roof installation is watertight and meets quality standards.
Important final checks include:
- Inspect all seams: Look for voids, wrinkles, or weak welds and repair immediately.
- Check flashing details: Ensure all penetrations, edges, and termination points are fully sealed and properly bonded.
- Conduct leak test: Depending on local code and project scope, perform a water test or electronic leak detection to confirm the membrane’s integrity.
A detailed inspection now prevents costly repairs later — and guarantees a durable, high-performance roofing system.
Request A Free Quote
Speak To Our Roofing Specialists Today!
National Roofing & Solar offers expert commercial roof replacements, leak repairs, and solar upgrades, maximizing energy efficiency and ROI.
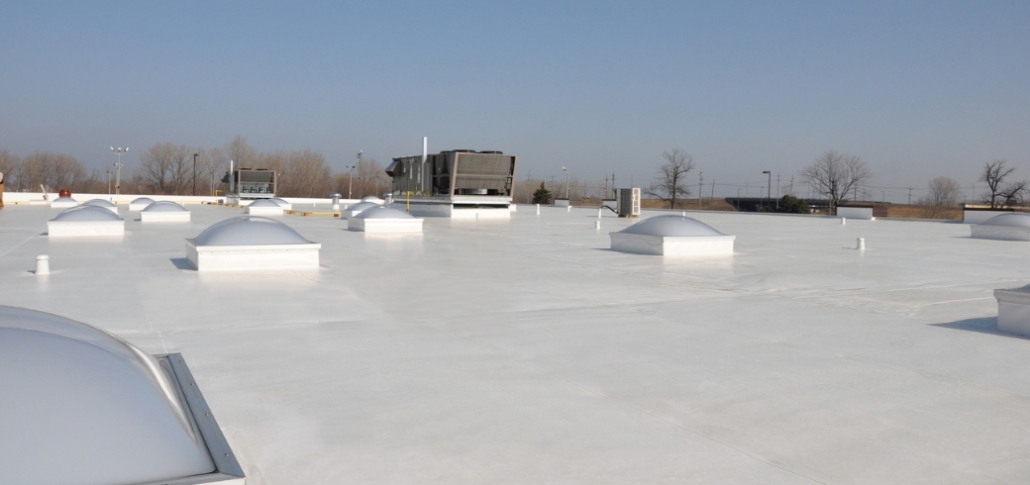
Pros and Cons of TPO Roofing
TPO roofing is a popular choice for commercial and residential flat roofs, offering a blend of affordability, durability, and energy efficiency. But like any roofing system, it has both advantages and limitations you should consider before making an investment.
TPO Roofing Benefits and Drawbacks at a Glance
| TPO Roofing Advantages | TPO Roofing Limitations |
| Cost-effective compared to other single-ply options | Requires proper heat-welding techniques for seam strength |
| Reflective surface improves energy efficiency and reduces cooling costs | Dependent on skilled installers for reliable performance |
| Flexible installation methods: mechanically attached, fully adhered, or ballasted | Poor installation can lead to premature seam failures and leaks |
| Resistant to UV radiation, ozone, and chemical exposure | Less proven long-term track record compared to older materials like EPDM |
| Lightweight material reduces structural load | Vulnerable to punctures from sharp debris or tools if not protected during installation |
By weighing these pros and cons, you can decide whether TPO roofing fits your building’s needs, climate conditions, and budget. In many cases, TPO offers outstanding value — especially when installed by experienced, certified professionals who ensure seams are properly heat-welded and flashing details are watertight.
TPO Roofing Costs
Understanding the cost of TPO roof installation is essential for budgeting and comparing it with other roofing systems. Costs can vary based on multiple factors, but here’s a detailed look at what you can expect.
Average Cost per Square Foot
The average cost of TPO roof installation — including materials and labor — typically ranges from $5.50 to $9.50 per square foot. This includes:
- Material costs: $1.50–$3.00 per sq. ft.
- Labor and installation: $4.00–$6.50 per sq. ft.
Thicker membranes, additional insulation, and complex roof layouts can push pricing toward the higher end of that range.
Cost Comparison: TPO vs. PVC vs. EPDM
| Roofing System | Average Cost (Installed, per sq. ft.) | Durability | Energy Efficiency |
| TPO | $5.50 – $9.50 | 20–30 years | High (UV reflective) |
| PVC | $7.00 – $11.00 | 25–35 years | High (UV reflective) |
| EPDM | $4.00 – $8.00 | 20–30 years | Moderate (black absorbs heat) |
TPO sits between EPDM and PVC in price and performance, offering a balanced mix of value, energy efficiency, and lifespan — especially in warmer climates.
Key Factors That Influence TPO Roofing Costs
Several variables affect the final cost of a TPO installation project:
- Roof size: Larger roofs generally cost less per square foot because of economies of scale.
- Insulation type and thickness: High-performance insulation materials or thicker layers increase material costs.
- Roof complexity: Irregular shapes, many penetrations, or multiple levels require more labor and precision.
- Geographic region: Labor costs, permit fees, and material availability vary widely by location.
- Contractor expertise: Hiring certified and experienced TPO installers may come with a premium but reduces the risk of installation errors.
By considering these factors, you can better plan your budget and ensure you choose the right materials and contractor for a long-lasting, cost-effective TPO roofing system.
Maintenance Tips to Maximize TPO Roof Lifespan
Proper maintenance is essential to extend the life of your TPO roof and protect your investment. Here’s how to keep your roof performing at its best for decades:
Regular Inspections
Schedule professional inspections at least twice a year — ideally in the spring and fall — and after severe weather events. During inspections, look for punctures, seam separations, membrane shrinkage, and debris accumulation, especially around drains and rooftop equipment.
Safe Cleaning Practices
Keep the surface clean by removing dirt, leaves, and debris regularly. Use a soft-bristle broom or low-pressure water rinse. Avoid harsh chemicals, power washing, or abrasive tools, which can damage the membrane and shorten its lifespan.
Watch for Signs of Wear
Over time, look for signs of aging such as cracking, bubbling, or persistent ponding water. If you notice loose flashing, open seams, or membrane punctures, contact a qualified roofing professional immediately to prevent leaks and further damage.
Routine inspections and proactive repairs are the best way to ensure your TPO roof continues to deliver energy efficiency, water-tight protection, and long-term value.
How to Choose a Reliable TPO Installer
Selecting the right contractor is just as crucial as choosing the right roofing material. TPO roof installation requires precision heat-welding and attention to detail — which is why working with certified, manufacturer-trained professionals is critical. Certified installers have specialized training in proper membrane handling, seam welding, and flashing techniques, helping ensure your warranty remains valid and your roof performs as expected.
Questions to Ask Before Hiring
When interviewing potential contractors, ask questions such as:
- Are you certified by the TPO membrane manufacturer?
- How many years of experience do you have installing TPO roofs?
- Can you provide references from recent TPO projects?
- What type of warranty do you offer on materials and workmanship?
- How do you handle repairs if issues arise after installation?
Review warranties carefully and avoid contractors with vague contracts or unusually low bids. For peace of mind, trust certified experts like National Roofing & Solar. We deliver quality TPO installations with strong warranties and excellent service. Contact us today.
Frequently Asked Questions
Typically, a TPO roof is installed over layers of insulation, such as polyiso or EPS, and a cover board that provides a stable, protective surface for the membrane.
It depends on the installation method. TPO roofs can be mechanically attached with fasteners or fully adhered using bonding adhesive.
With proper installation and maintenance, a TPO roof typically lasts 20–30 years. Regular inspections help maximize lifespan.
Prolonged ponding water isn’t ideal. While TPO is waterproof, standing water can stress seams and lead to premature wear.
In some cases, TPO roofs can be restored with specialty coatings to extend their service life, but consult a roofing professional first.
Request A Free Quote
Speak To Our Roofing Specialists Today!
National Roofing & Solar offers expert commercial roof replacements, leak repairs, and solar upgrades, maximizing energy efficiency and ROI.
Final Thoughts & Call-to-Action
In this article, we’ve covered TPO roof installation as an affordable, energy-efficient solution for protecting your building. From understanding the step-by-step process and weighing the pros and cons to comparing costs and learning maintenance tips, you now have the information needed to make an informed decision for your roofing project.
For reliable, high-quality TPO roof installation backed by strong warranties and expert service, trust the certified professionals at National Roofing & Solar. Contact us today to schedule a free consultation and protect your investment with confidence.