EPDM Roof Installation – The Commercial Playbook for MA/CT/RI
EPDM roof installation is the process of installing an ethylene propylene diene monomer (EPDM) rubber membrane over a prepared low-slope roof to create a watertight, warrantable roofing system.
If you want EPDM to perform in New England, the “win” is simple:
- Start on a dry, stable deck
- Pick the right attachment method for your wind zone and building use
- Work inside the manufacturer’s temperature and surface-condition limits
This guide walks through the commercial sequence, what to verify before materials arrive, what must be true before you start bonding, and which details most often prevent leaks and callbacks.
Need an installer’s eyes on your roof first? Add an internal link to: Commercial roof inspection services in Massachusetts, Connecticut, and Rhode Island (Free Consultation + written scope).
EPDM Roof Installation Checklist (Fast Overview)
A correct EPDM install follows the same order on every job:
- Assess & scope (structure, moisture, drainage, penetrations, wind)
- Prep the substrate (clean, dry, smooth, solid)
- Choose the system (fully adhered, mechanically attached, or ballasted)
- Stage materials & plan the weather window
- Install membrane + seams + flashings
- Finish edges, drains, walk pads
- QC + closeout docs
- Maintenance plan (to protect warranty)
Use the sections below as a pre-mobilization checklist.
1. What must be true before you order EPDM?
Goal: Confirm the roof can accept EPDM as designed before you buy the membrane, insulation, and edge metal.
Field checklist (photo + notes):
- Deck type & condition: steel, concrete, wood, gypsum, lightweight concrete; look for rust, rot, spalls, delamination, and fastener pull-out risk.
- Moisture status: core cuts and/or moisture scan where needed. Replace wet insulation; don’t cover it.
- Drainage map: drains/scuppers, low points, ponding areas, clogged leaders, pitch problems.
- Penetrations & edges: curbs, pipe clusters, parapet heights, and existing edge metal condition (many failures start here).
- Owner/insurer requirements: warranty term, wind/FM criteria, edge specs, hot-work limits, uptime constraints (schools, healthcare, warehouses).
Rule that saves jobs: Manufacturers repeatedly call for compatible, clean, dry, smooth substrates. Wet or unstable surfaces break adhesion and can block warranty closeout.
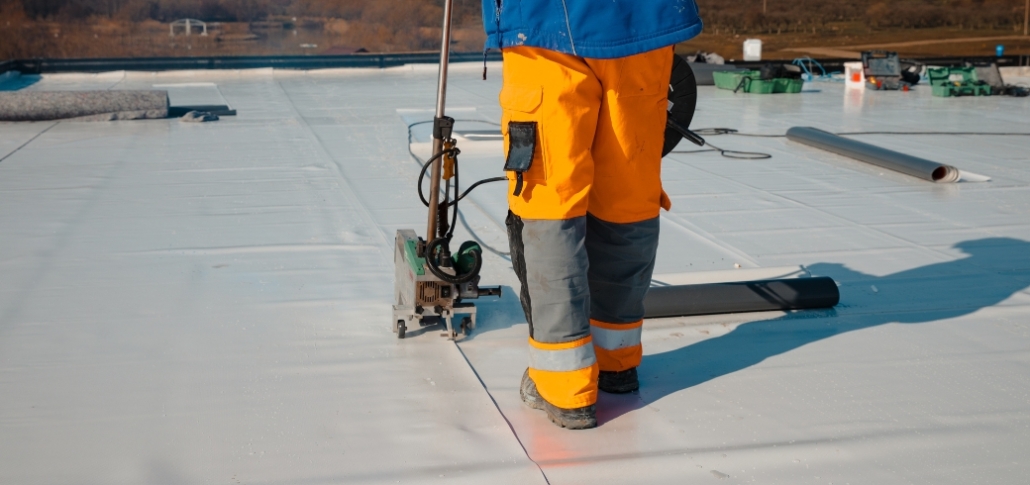
2. How do you prep the roof so it’s ready for EPDM?
Goal: Give crews a surface that is clean, dry, smooth, and structurally sound.
Prep tasks that matter on real projects:
- Remove/replace saturated insulation, soft decking, loose fasteners, deteriorated cover boards.
- Smooth the surface: eliminate sharp edges, debris, ridges, and high fastener heads that can telegraph through the membrane.
- Keep it dry: don’t trap moisture. Plan daily “dry-in” boundaries so insulation isn’t left exposed overnight.
- Lock the drainage plan early: tapered layout, crickets, drain resets, scupper heights—do this before the membrane goes up so you’re not patching later.
- Set rooftop routes: decide where crews will walk and stage so you can protect those areas (walk pads or temporary protection).
3. Which EPDM system should you choose?
There are three common EPDM attachment methods. The right choice depends on wind exposure, deck type, building use, and schedule.
Quick comparison
Fully adhered
- Best for: higher wind performance, complex roofs, many penetrations, “quiet” roofs where flutter/noise is a concern.
- Watch-outs: adhesive limits are strict (temperature, dryness, flash time). More labor.
- Avoid when: you can’t keep materials warm or can’t meet adhesive surface conditions.
Mechanically attached
- Best for: faster installs, many deck types, lighter assemblies, budget-driven projects.
- Watch-outs: more flutter/noise potential; perimeter/corner fastening is critical.
- Avoid when: deck holding values for fasteners are poor or unknown.
Ballasted
- Best for: large open roofs when structure can carry the load and edge containment is strong.
- Watch-outs: weight, access for maintenance, edge details and paver/stone retention.
- Avoid when: structural capacity is tight, wind exposure is high, or parapets/edges can’t contain ballast reliably.
Decision tip: If plant uptime is critical, fully adhered often reduces risk from membrane movement and can simplify detailing around equipment, but only when the adhesive window is realistic.
4. Weather window & material staging (New England reality)
Most install failures happen when materials are cold, surfaces are damp, or product limits are ignored.
Temperature and storage basics (check your product data sheets)
- Many EPDM bonding adhesives require ambient + substrate temperatures above ~20°F and rising (exact limits vary by product).
- If adhesives/primers get cold, bring them back into the manufacturer’s conditioning range (often 60°F–80°F) before use.
- Keep membrane rolls and accessories warm and bring them to the roof shortly before installation.
- Stop work if dew, frost, or light rain is turning the deck or insulation face damp; bonding to a wet surface is a repeat-callback recipe.
Staging checklist (day before mobilization)
- Storage area: clean, dry, secure (membrane, insulation, adhesives).
- Rooftop staging: minimize travel paths; protect walk zones; keep tools and fasteners organized.
- Daily dry-in plan: define what gets closed each day so nothing sits open overnight.
- Tie-in plan: know exactly how you’ll close edges and transitions at the end of each shift.
5. Codes & design checks for MA/CT/RI (what drives performance)
These items are code-driven or wind-driven. Missing them often leads to ponding, edge damage, or stoppages—not “savings.”
Minimum slope & drainage
- Design slope: single-ply low-slope roofs are commonly designed at ¼:12 (2%) to drain.
- Secondary (overflow) drainage: where parapets/edges could trap water, code requires emergency overflow drains or scuppers.
- Scupper height/size: set and size overflow scuppers so water exits before it overtops or gets trapped.
Field method: map low points (laser/level), confirm primary drains, and add overflow paths where water could be entrapped.
Edge securement (ES-1)
- Specify perimeter edge metal tested to ANSI/SPRI/FM 4435 (ES-1).
- Install it per the tested assembly instructions (cleats, fasteners, spacing). No field improvisation.
Internal link to add: Commercial roof edge metal and coping replacement (ES-1 compliant) in MA/CT/RI.
OSHA fall protection (low-slope roofs)
Low-slope is commonly treated as ≤ 4:12. Fall protection depends on distance from the roof edge:
- Within 6 ft: guardrails, safety net, travel restraint, or PFAS required.
- 6–15 ft: same options; a designated area is limited to infrequent/temporary work.
- 15 ft or more: follow OSHA low-slope provisions for controls and monitoring.
Request A Free Quote
Speak To Our Roofing Specialists Today!
National Roofing & Solar offers expert commercial roof replacements, leak repairs, and solar upgrades, maximizing energy efficiency and ROI.
6. What goes under the membrane: insulation, cover board, vapor control
A durable EPDM system depends heavily on the layers below the membrane.
Insulation stack-up
- Two layers of above-deck insulation with staggered joints reduces heat-loss paths and lessens telegraphing.
- Keep joints tight; fill gaps so the membrane has continuous support.
- Stagger end joints at perimeters and around penetrations so stress isn’t concentrated in one line.
Best for: warehouses, schools, retail buildings where winter heat loss and service traffic are real.
Cover boards (when they’re worth it)
A cover board is a rigid layer above insulation that creates a tougher, smoother surface and can improve uplift, impact, and fire performance.
Add a cover board when:
- Hail/impact risk is meaningful
- Foot traffic is frequent (HVAC routes, service areas)
- You want stronger seam support and better dent resistance
Common options:
- Gypsum / gypsum-fiber (good fire and impact performance; heavier)
- High-density polyiso cover board (lighter handling; approvals vary by product)
Internal link to add: Commercial roof walkway pads and protection accessories.
Vapor retarder (use it when physics says “yes”)
Add a vapor retarder when interior humidity/process loads are high or dew-point checks show condensation risk inside the roof assembly.
Practical steps:
- Gather indoor temperature + RH targets from the owner/engineer.
- Do a condensation check for design conditions.
- Place the vapor retarder as close to the deck as feasible and seal it at edges/penetrations.
Avoid a vapor retarder if you can’t seal and terminate it correctly; air bypass can create moisture problems.
7. Install details that prevent leaks and warranty problems
Materials you need on the roof before you start
Keep these items staged and protected so crews aren’t “making it up” mid-install:
- Membrane (correct width/length), accessories, manufacturer-approved cleaners
- Bonding adhesive (if fully adhered), primer, seam tape, lap sealant (as required by system)
- Plates/fasteners (for mechanical components), termination bars, edge metal pieces
- Flashing accessories (pipe boots, corner pieces, uncured flashing where specified)
- Walk pads for planned service routes
- Rollers, seam probes, wet film gauge (if required), and simple temperature checks (IR thermometer)
Adhesives, primers, and low-VOC notes
- Follow product limits for temperature, surface dryness, and flash time.
- In occupied buildings, select low-odor/low-VOC products that meet local air-quality rules and job specs.
- Cold-weather tip: use heated storage/hot boxes so primers and adhesives stay within range.
Seams and splices (tape + primer)
Modern EPDM seams commonly use seam tape with primer. The result is only as good as the prep.
Seam checklist:
- Clean and prime both mating surfaces per manufacturer instructions.
- Keep overlaps consistent (follow your system’s minimum; many details call for overlaps in the 3-inch range or greater).
- Roll the seam with uniform pressure, edge-to-edge.
- Probe/check seams during QC, not after the roof is “done.”
- Keep foot traffic off fresh seams until the seam work is finished and checked.
Flashings at curbs and penetrations
Penetrations and roof-to-wall transitions are common leak points.
Flashing rules:
- Use uncured EPDM flashing where flexibility is needed (tight bends, irregular shapes).
- Use termination bars where required and seal per system details.
- Tie in base flashings correctly at verticals; don’t rely on surface sealant as the “system.”
- At corners and angle changes, use preformed corners or approved corner details rather than stretching flat stock.
Internal link to add: Commercial roof seam and flashing repair services in New England.
8. Penetrations, equipment supports, and walkways
Plan penetrations before the membrane goes down
- Confirm pipe clusters, supports, and equipment locations early.
- Reduce field cuts by grouping penetrations where practical.
- Use manufacturer flashing kits/accessories for pipes and supports.
Protect service routes
Walkway pads protect EPDM from punctures and abrasion in high-traffic areas:
- Place pads along equipment routes and around units.
- Use slip-resistant pads suited to the membrane type and expected traffic.
- Keep pathways obvious so techs don’t wander across the field membrane.
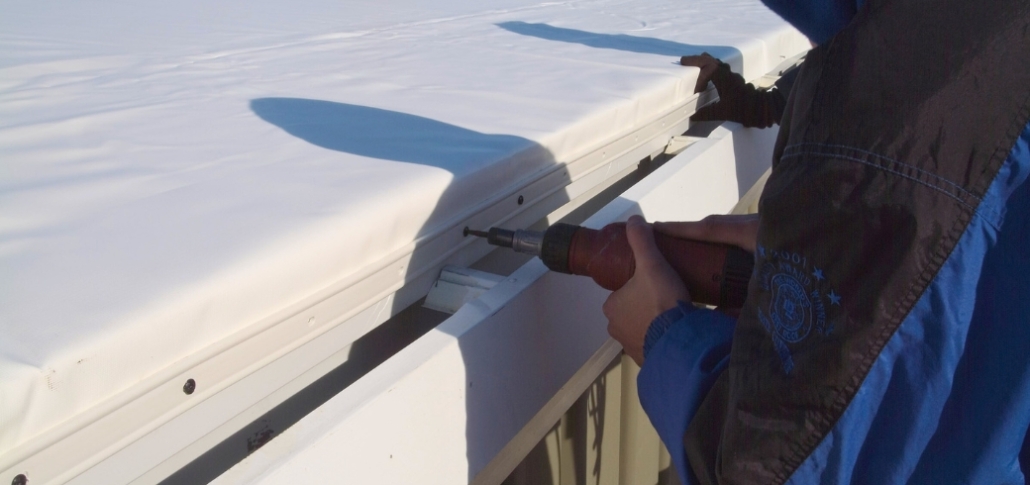
Edge metal, parapets, and terminations
Edges take the highest wind forces. Many blow-offs start here.
Edge checklist:
- ES-1 tested edge metal with approved shop drawings/submittals.
- Correct cleat type, fastener spacing, and metal thickness for the wind zone.
- Termination bars at wall transitions where the system requires them, with the correct sealant bead and fastening.
- If parapets are low, plan how the membrane terminates and how overflow drainage works before install day.
Drainage execution & QC (catch issues while you can still fix them)
Drains and scuppers
- Set drains at low points and confirm positive flow paths.
- Use tapered insulation/crickets to guide water.
- Confirm overflow scuppers/drains are in place where required.
- Keep drains protected during the job so debris doesn’t get pushed into leaders.
QC checklist (minimum)
- Fastener pull tests (where mechanically attached components are used).
- Seam probing/inspection on a schedule (daily, and at closeout).
- Photo log corners, perimeters, penetrations, drains, tie-ins, and any repairs.
- Record membrane lot numbers and installation conditions (temps, weather notes) for closeout.
Closeout items that make warranty approval easier
- Final photo set (overall roof, edges, drains, penetrations, seams)
- Daily reports (weather, crew count, areas installed, tie-ins)
- Test results (pull tests if used, moisture verification, as required)
- Submittals for edge metal and accessories
- Punch list with sign-off dates and repairs documented
The top causes of leaks and callbacks (quick list)
If you want a short “what not to do” list, it’s this:
- Installing over wet insulation or damp surfaces
- Skipping the cleaning/priming steps on seams and flashings
- Rolling seams too lightly or inconsistently
- Under-fastening perimeters/corners or using the wrong fasteners for the deck
- Non-tested edge metal details or “field-made” edge assemblies
- No overflow drainage where parapets trap water
- Poor temporary tie-ins overnight (especially before rain or frost)
- No walk protection near HVAC units and service routes
Phasing, weather, and occupied buildings
Seasonal planning
- Schedule adhesive-heavy work during milder months whenever possible.
- In cold periods, plan shorter work zones with reliable temporary tie-ins to avoid exposing insulation or open edges overnight.
- Protect primers and seam areas from frost and debris before rolling and closure.
Working over occupied space
- Plan shifts (nights/weekends) when noise, odor, and access need tight control.
- Use temporary coverings and protection for sensitive areas.
- Provide daily safety/quality sign-offs so the building stays operational.
Post-install maintenance (protect the warranty)
A small maintenance routine prevents most avoidable failures.
Minimum plan:
- Inspect twice per year and after major storms.
- Clear drains and scuppers; remove debris.
- Check seams, flashings, and edge metal for movement or damage.
- Repair punctures and loose details quickly; small problems grow fast on low-slope roofs.
- Keep a simple roof log (dates, photos, repairs) so warranty claims have a clean paper trail.
Request A Free Quote
Speak To Our Roofing Specialists Today!
National Roofing & Solar offers expert commercial roof replacements, leak repairs, and solar upgrades, maximizing energy efficiency and ROI.
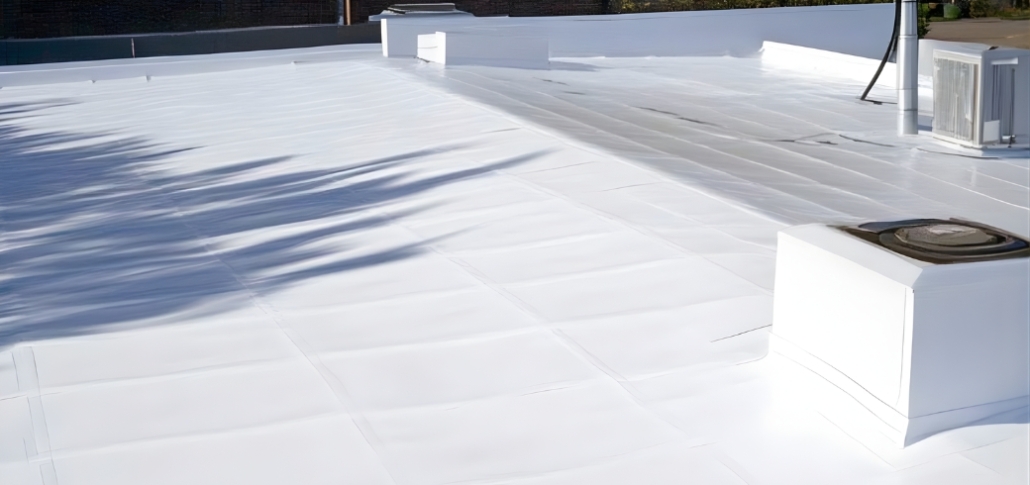
Conclusion
EPDM roof installation is a reliable, cost-effective solution for commercial buildings in New England, offering long-term performance when done correctly. By following the right steps for assessment, preparation, and installation, while adhering to local codes and manufacturer guidelines, you can ensure your roof is durable and well-protected.
Regular maintenance and inspections will further extend its lifespan and protect your warranty. Need expert help? Contact National Roofing & Solar for a consultation or roof inspection to ensure your EPDM installation meets the highest standards.